
Holiday Bells Large Stencils

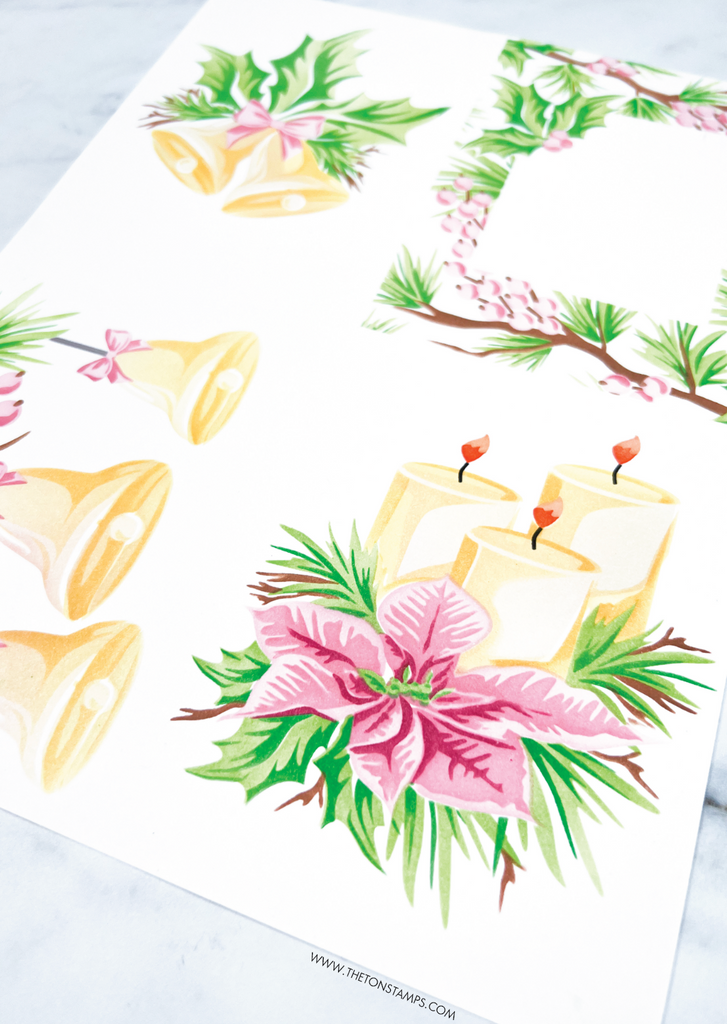


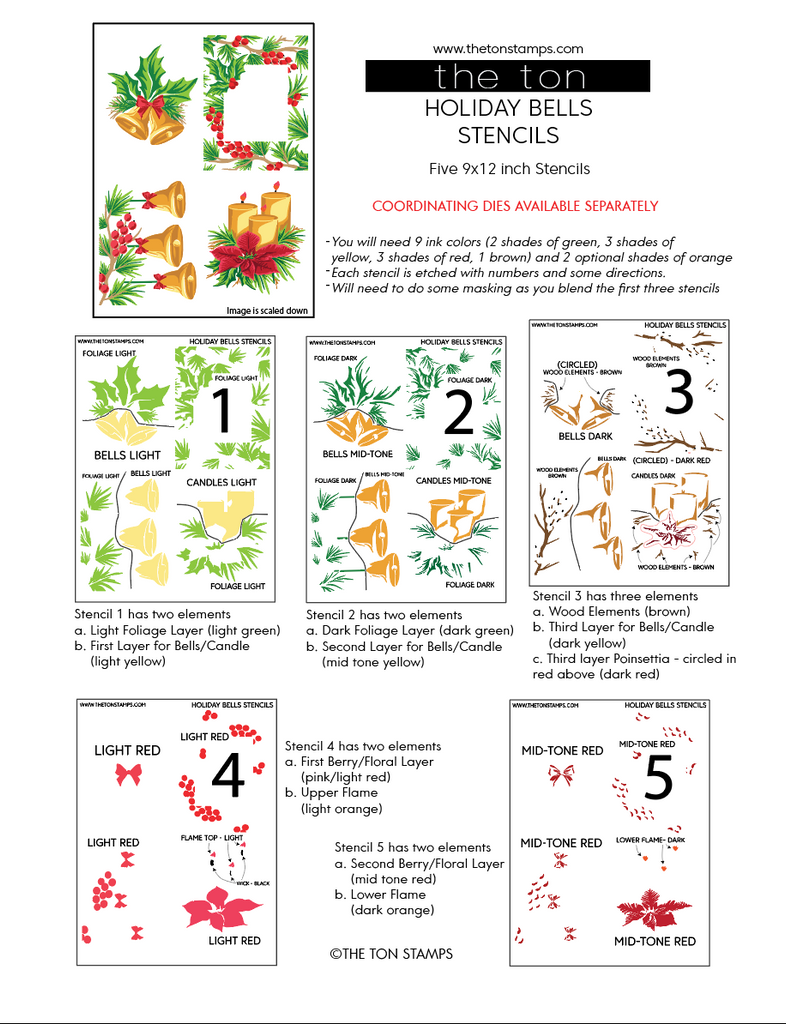


This is a 9x12 inch 5 stencil layering collection.
There are numbers and instructions etched on the stencils to help guide you through the layering process. There are multiple elements on some of the stencils. You are required to mask off areas as you blend some of the stencils.
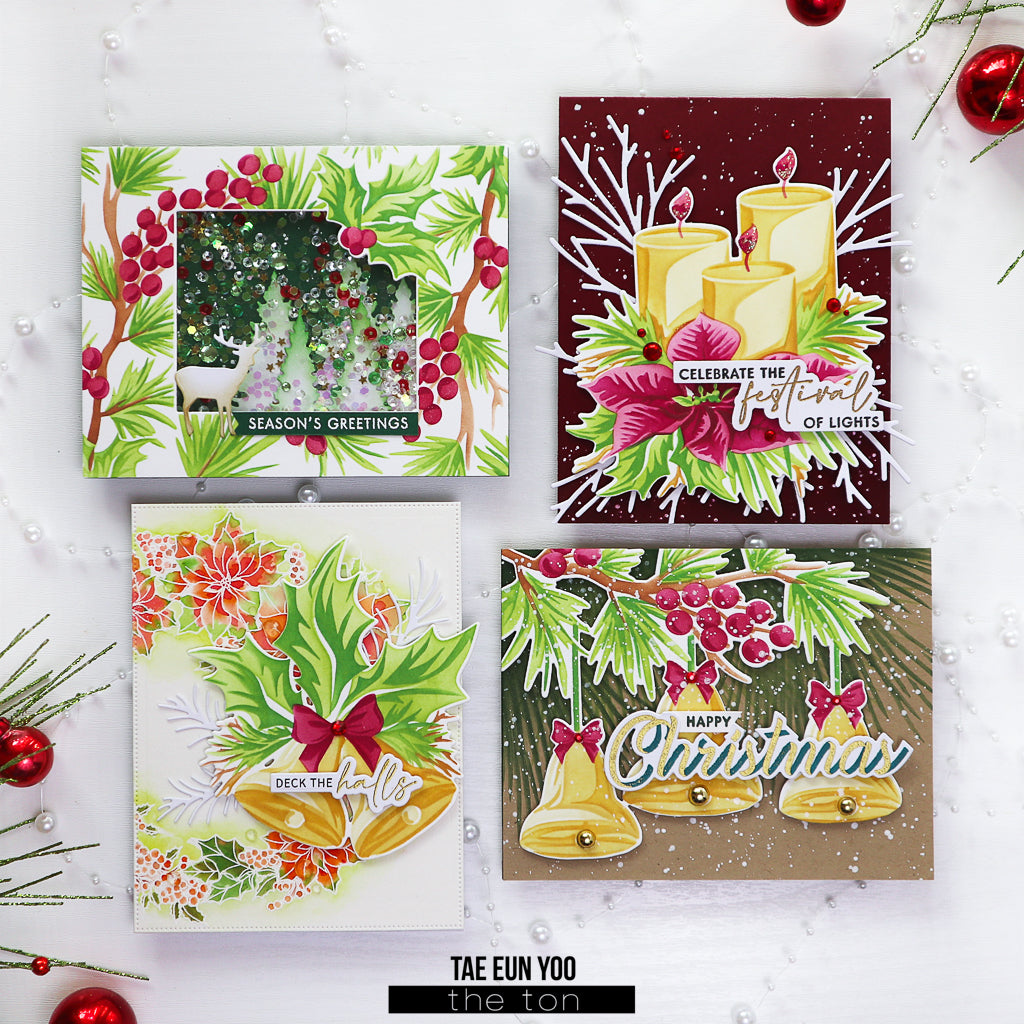
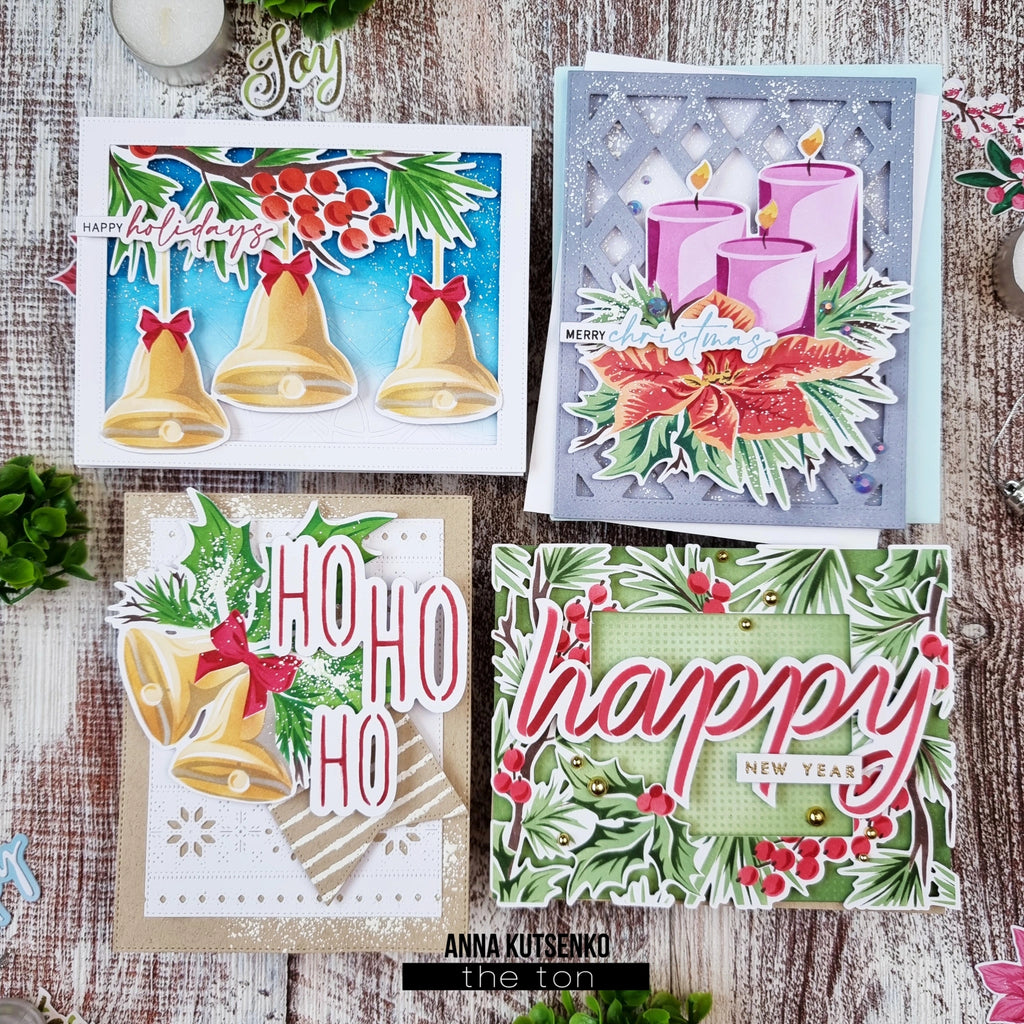
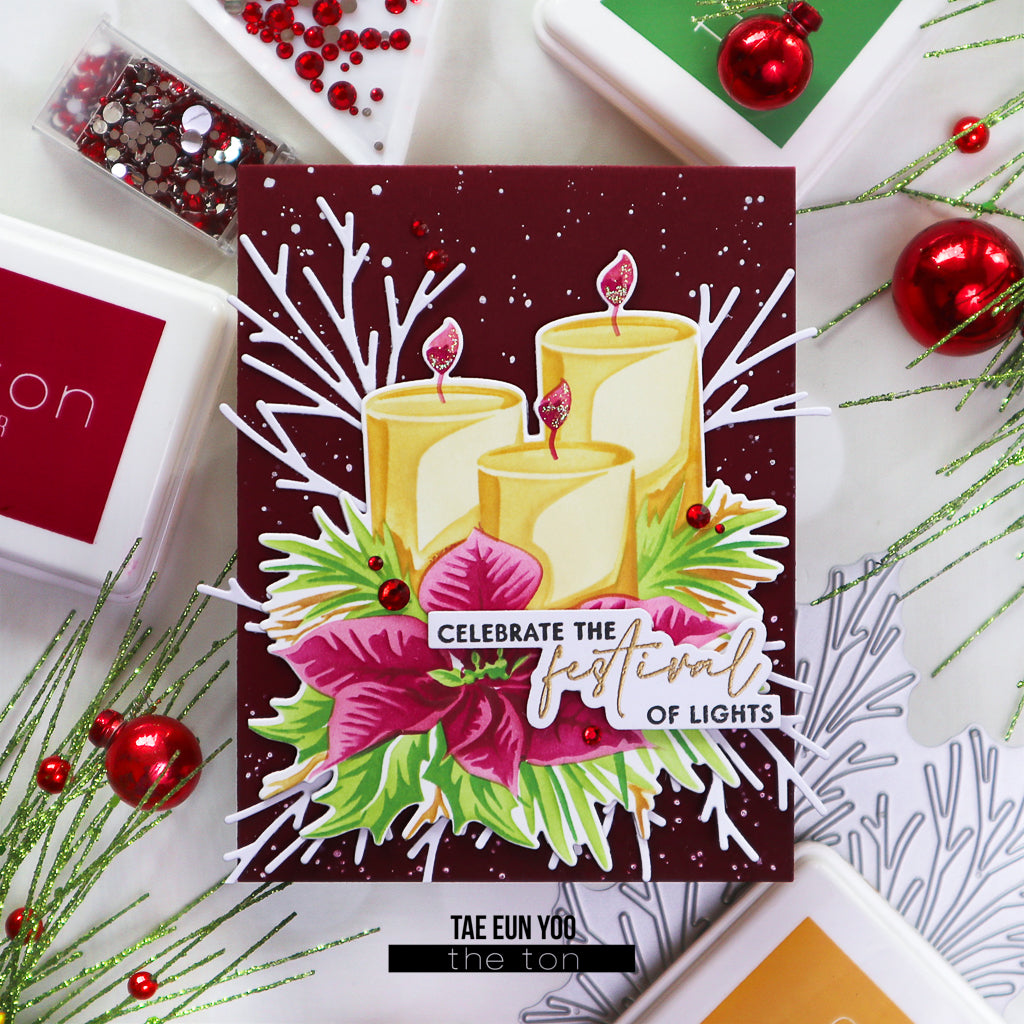
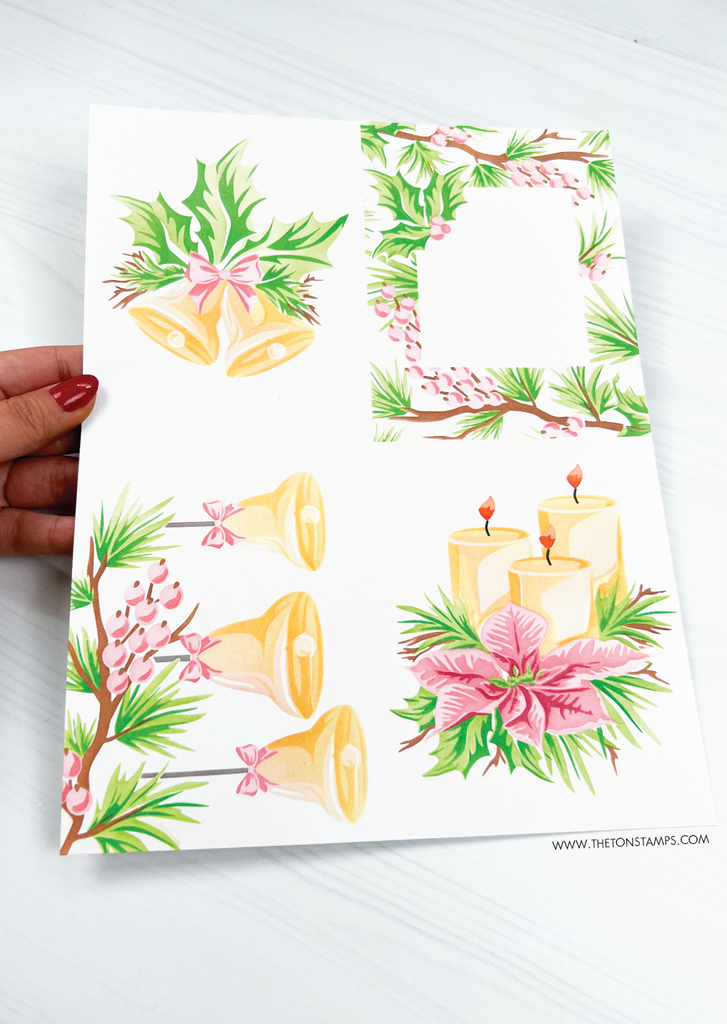
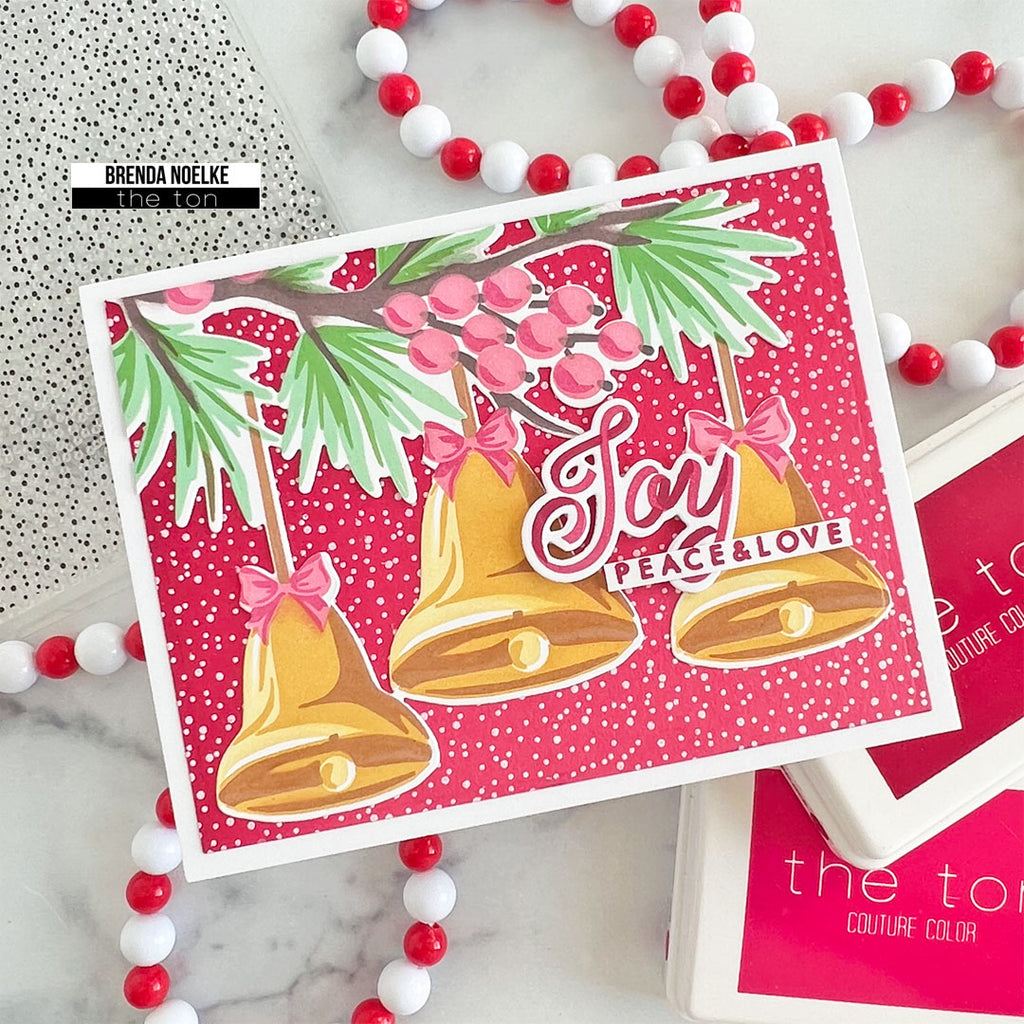
Once you layer all five stencils onto an 8.5 x 11 inch piece of cardstock, the result is a beautiful blended page that you can cut in half on each side to create four ready-to-make A2 cards.
- 9x12 inches
- 5 stencils
- Each stencil has a number etched on it to help guide you in layering this product.
- Coordinating dies available here
Instructions: You'll need 9 ink colors (2 shades of green for foliage, 3 shades of yellow for the bells/candle, 3 shades of red for berries/bows/floral, 1 brown for the branch and 2 optional shades of orange for the flame)
**There are lines etched on the stencils to show you where to separate some of the colors. For example on stencil one, there are two elements on that stencil - the first layer of the foliage (light green) and the first layer of the bells/candles (light yellow). As you blend your foliage, you have to mask parts of the yellow elements of the stencil as you go and vice versa (mask the foliage elements as you blend the yellow).
Position your stencils to ensure the numbers and instructions are read upright. If the numbers or upside down or sideways, rotate the stencil until the numbers are upright.
For stencil #1: blend light green for foliage and light yellow for the first layer of the bells/candles.
For stencil #2: blend dark green for foliage and mid tone yellow for the second layer of the bells/candles.
For stencil #3: there are THREE elements on this stencil. Blend brown for the wood elements, dark yellow for the third layer of the bells/candles. On the lower right quadrant, the etched circled area in the center is the THIRD layer of the poinsettia. Blend this area with your darkest red.
For stencil #4: blend this layer with light red. You can use a darker orange for the flame tops (indicated with etched instructions on the stencil). You can also use black ink for the wicks (also indicated with etchings on the stencil).
For stencil #5: blend this layer with mid tone red. However, you can use a lighter orange for the lower portions of the flame (indicated with etched instructions on the stencil).